Stephen's build blog
PURCHASE
Pic 1
Marauder 001 - 25/7/10
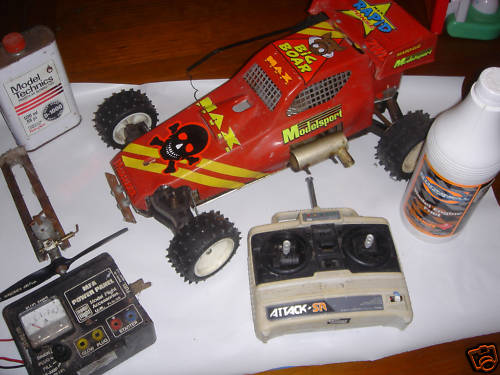
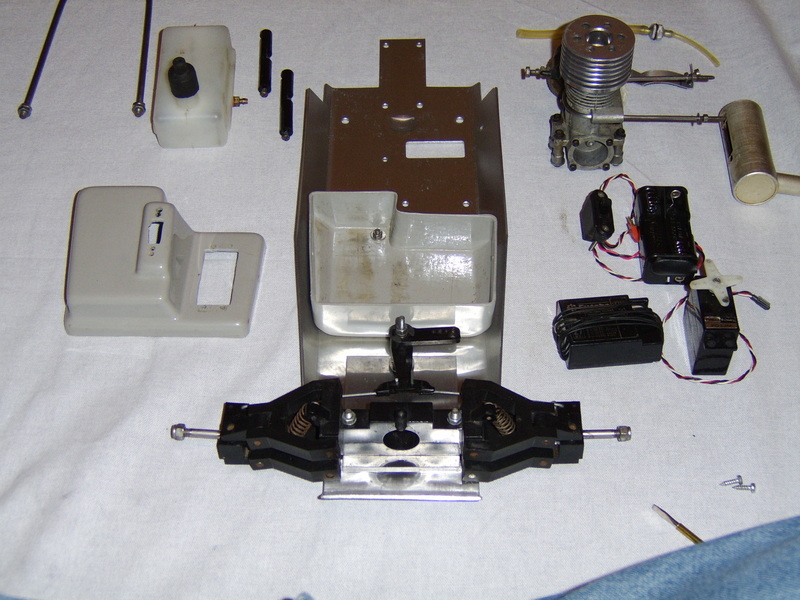
Picked up the new Marauder from North Wales (about 30 Miles each way from / to Liverpool) that was won on ebay. After a look over to see what I had I stripped the decals off (an instant improvement). There was an original set of instructions with the car so this was an unexpected bonus (even with a little damage). The engine fitted is an O.S. MAX 21 FSR-C (I think the 'C' signifies 'car' hence a nice large heat sink head), the radio gear is a full original Futaba set supplied by Ripmax and is identical to those used in the build instructions, the car also has the original un-damped suspension so it is all very original.
Picked up the new Marauder from North Wales (about 30 Miles each way from / to Liverpool) that was won on ebay. After a look over to see what I had I stripped the decals off (an instant improvement). There was an original set of instructions with the car so this was an unexpected bonus (even with a little damage). The engine fitted is an O.S. MAX 21 FSR-C (I think the 'C' signifies 'car' hence a nice large heat sink head), the radio gear is a full original Futaba set supplied by Ripmax and is identical to those used in the build instructions, the car also has the original un-damped suspension so it is all very original.
STRIP DOWN
Pic 2
Marauder 002 - 25/7/10
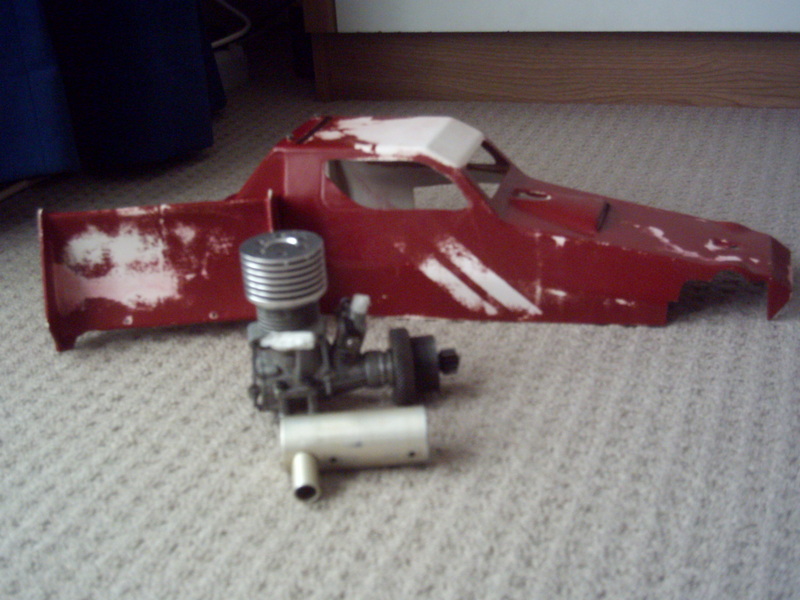
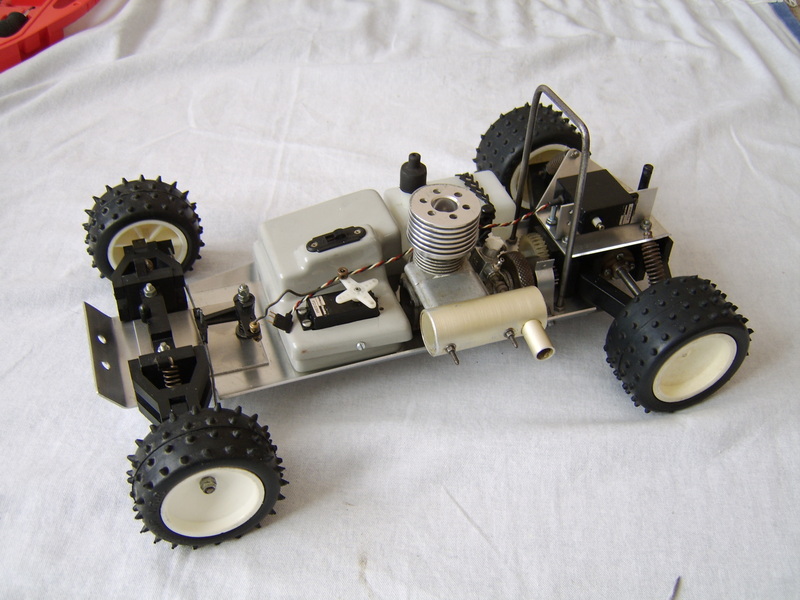
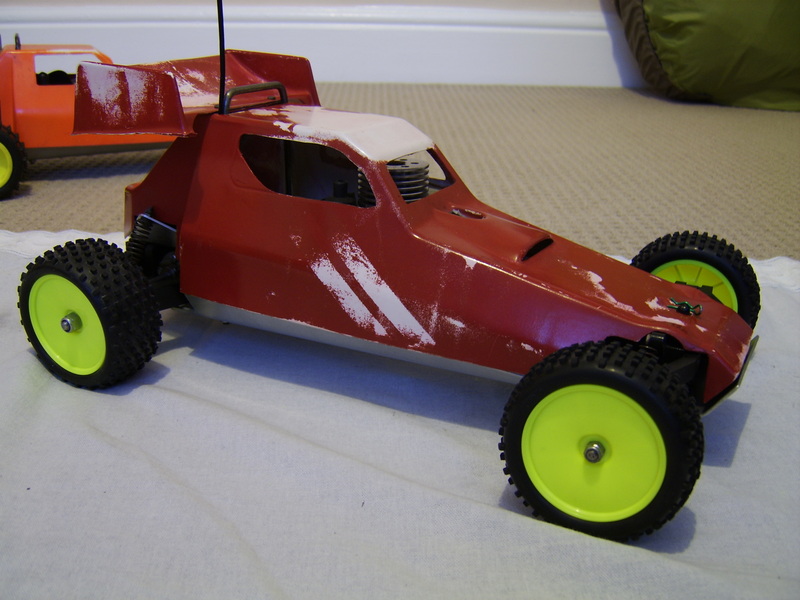
The model prior to the strip down, minus decals. Note the power panel this is a little worse for wear, it powers the starter and glow plug and also has a pump for filling / emptying the fuel tank. I will be getting or making a box to mount this in.
The model prior to the strip down, minus decals. Note the power panel this is a little worse for wear, it powers the starter and glow plug and also has a pump for filling / emptying the fuel tank. I will be getting or making a box to mount this in.
Pic 3
Marauder 003 - 28/7/10
After a few evenings work, all the radio gear has been removed, cleaned and tested with a new battery holder wired in and is all OK.
The wheels and tyres have been cleaned and the rear axles re-fitted as per the instructions on this site, I used super glue to seal up the hole in the rim and used loctite on the grubscrew. The rollbar has been cleaned up with emery paper.
I got some parafin to try and remove the paint from the body shell but it had little effect so I will have to try something else, the parafin can be used to clean up the other parts.
The front suspention has been removed and dismantled to clean the individual parts (the upper and lower wishbones are both different so its useful to note which is which before dismanteling), along with the servo saver and the reinforcing plate that sits under these parts. The reinforcing plate was filed smooth on the edges then rubbed down using a green scouring pad, this is hard work but it gives a matt / brushed finish that I think looks good. It would be best to use emery paper for the main cleaning and finish off with the scouring pad (thats probably what I did on my first Marauder). Also, while in Maplin for a new battery holder I spotted some plastic 'project boxes' for building electrical circuits into, so got one of these for the power pannel to be mounted into.
Pic 4
Marauder 004 - 30/7/10
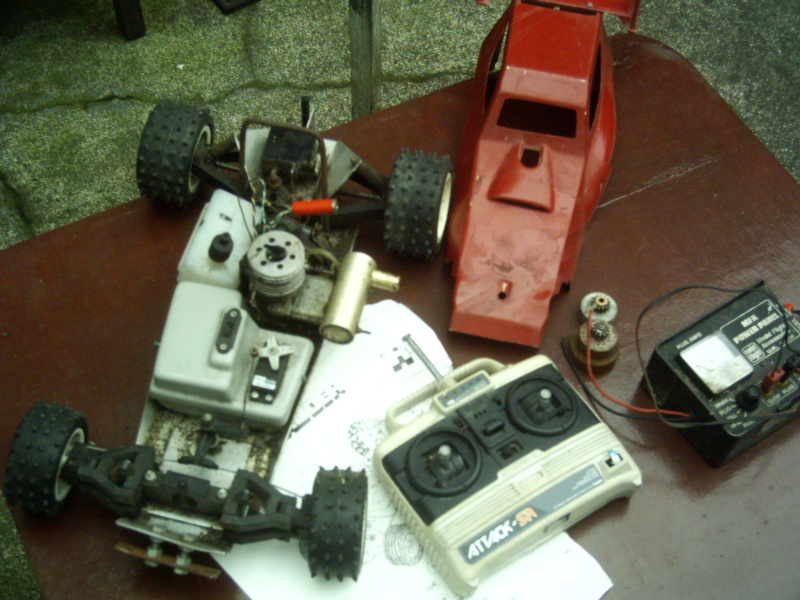
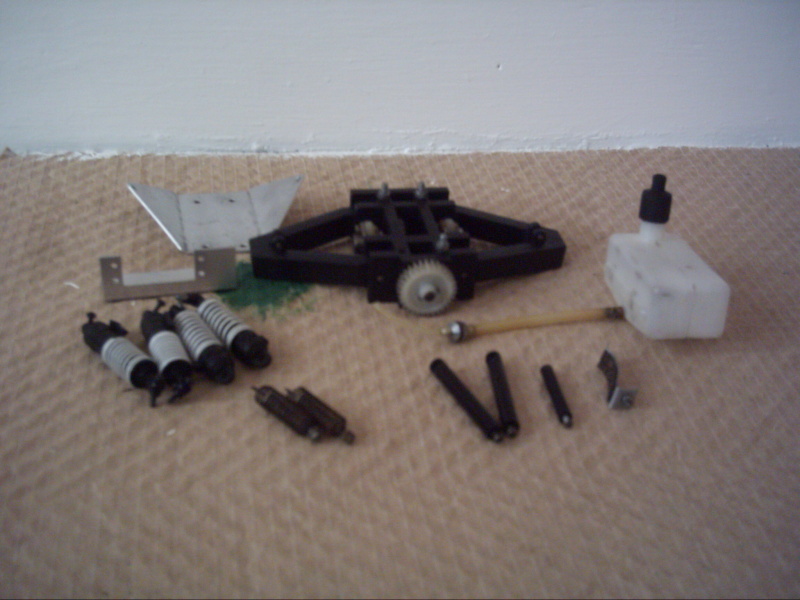
The chassis has now been stripped completely, the rear end suspension and drive have been fully stripped, cleaned and rebuilt into an assembly to keep all the bits together, I have got an new throttle servo mount that I had made when restoring my first Marauder and have got some shocks off a Thunder Tiger TS4N that will hopefully fit on the rear after some modification of the bevel box cover plate. The fuel tank just needed a wipe down.
The chassis has now been stripped completely, the rear end suspension and drive have been fully stripped, cleaned and rebuilt into an assembly to keep all the bits together, I have got an new throttle servo mount that I had made when restoring my first Marauder and have got some shocks off a Thunder Tiger TS4N that will hopefully fit on the rear after some modification of the bevel box cover plate. The fuel tank just needed a wipe down.
Pic 5
Marauder 005 - 30/7/10
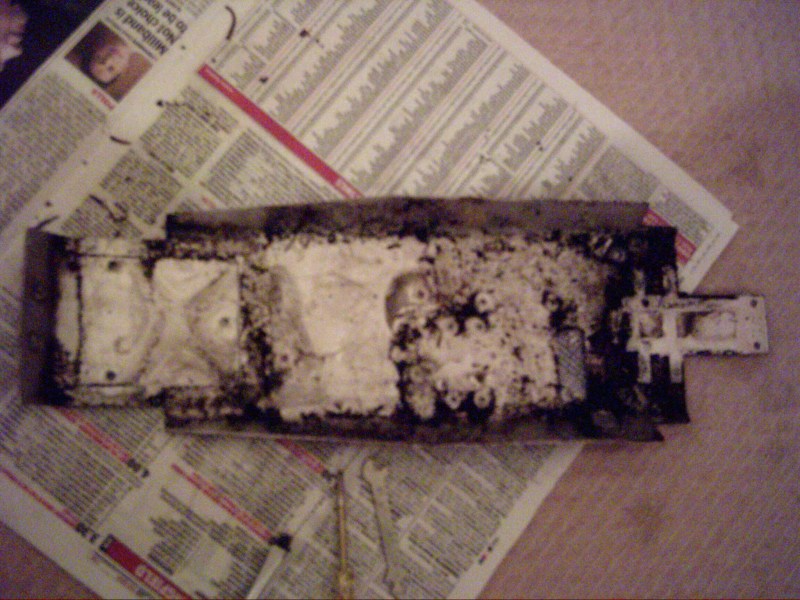
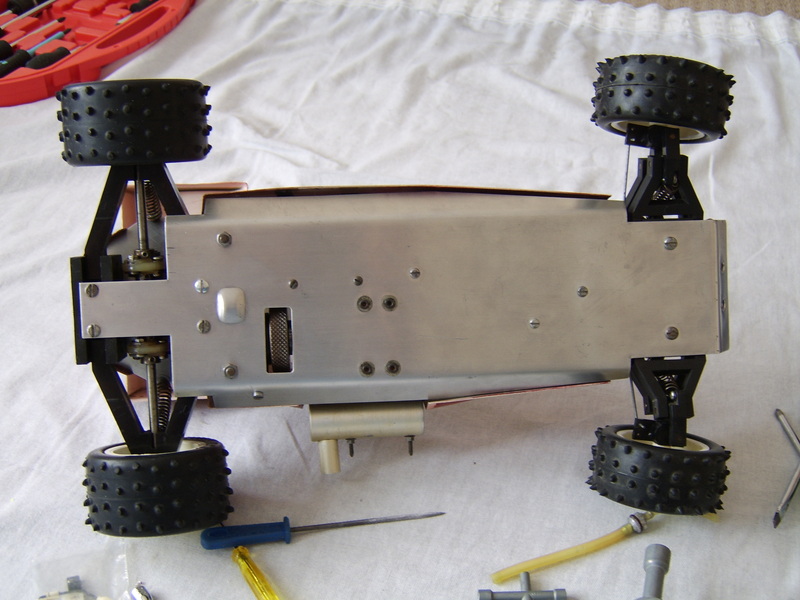
This photo is to show just how dirty the chassis is prior to cleaning, once it is fully cleaned and polished I will take another photo.
This photo is to show just how dirty the chassis is prior to cleaning, once it is fully cleaned and polished I will take another photo.
After cleaning the chassis and having a go at cleaning the engine I have come to the conclusion that paraffin is useless for the job as it also had little effect on the oil and dirt on the various parts. Most parts are now cleaned up to a suitable state with only the engine in need of a good clean.
The chassis needs straightening, final clean and polish (with scouring pad). And the body shell needs the paint removing before being re trimmed to neaten up where it has been quite poorly cut, I will try some thinners on the paint and hope that it doesn't melt the ABS shell!
The chassis needs straightening, final clean and polish (with scouring pad). And the body shell needs the paint removing before being re trimmed to neaten up where it has been quite poorly cut, I will try some thinners on the paint and hope that it doesn't melt the ABS shell!
Pic 6
Marauder 006 - 3/8/10
A nice clean engine and carb, not spotless but as good as they're getting! they have also been flushed out with the paraffin to remove any bits of dirt that have got in over the years.
The engine doesn't seem to have much compression but I will just have to see how it goes, the clutch is in very good condition though. I’ve also ordered an air filter.
The paint on the shell is proving tougher than I thought, the thinners have worked best but its still hard to get the paint to come off and it looks like it has crazed the surface of the plastic where I left it on.
Pic 7
Marauder 007 - 6/8/10
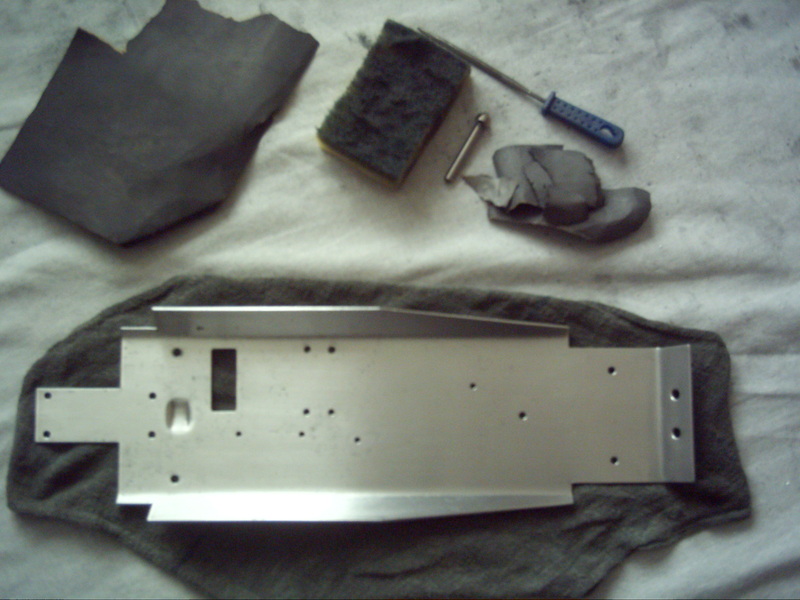
A messy and time consuming job but well worth it! The chassis is now completely cleaned up and ready to go, this probably took about 3 hours in all from the state it was (in photo 5) to as it is now. After being cleaned it has had the holes de-burred using a rose bud cutter (by hand so that they didn’t end up counter sunk!) and been rubbed down on both sides with P400 grade emery paper to remove any burrs and high points from scratches and knocks it had received. I then straightened out the front end using a soft faced mallet against a solid, flat metal surface (the top edge of metal railings). The edges where then smoothed off with a needle file all around before another rub with the P400 emery and finally a polish with a new scouring pad, this brightens the finish created by the emery and makes it more consistent, with less marks but without making it bright polished.
A messy and time consuming job but well worth it! The chassis is now completely cleaned up and ready to go, this probably took about 3 hours in all from the state it was (in photo 5) to as it is now. After being cleaned it has had the holes de-burred using a rose bud cutter (by hand so that they didn’t end up counter sunk!) and been rubbed down on both sides with P400 grade emery paper to remove any burrs and high points from scratches and knocks it had received. I then straightened out the front end using a soft faced mallet against a solid, flat metal surface (the top edge of metal railings). The edges where then smoothed off with a needle file all around before another rub with the P400 emery and finally a polish with a new scouring pad, this brightens the finish created by the emery and makes it more consistent, with less marks but without making it bright polished.
REBUILD
Pic 8
Marauder 008 - 6/8/10
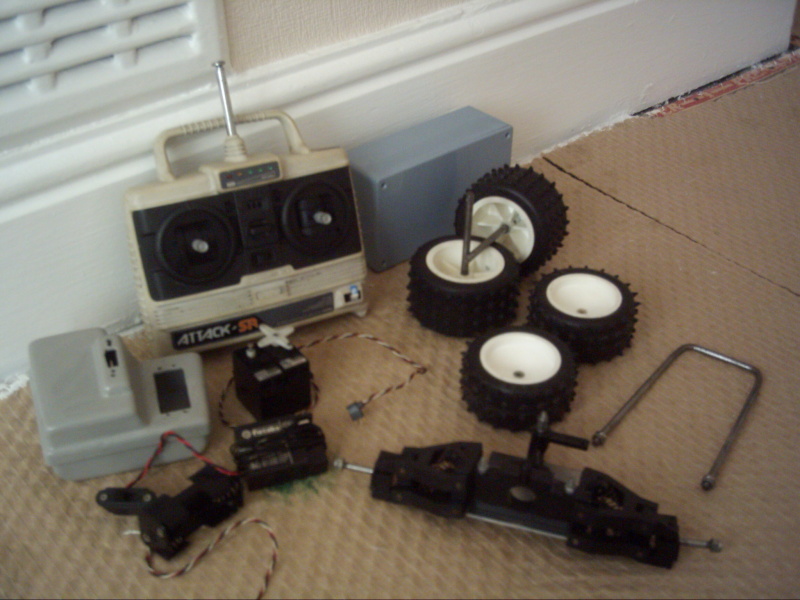
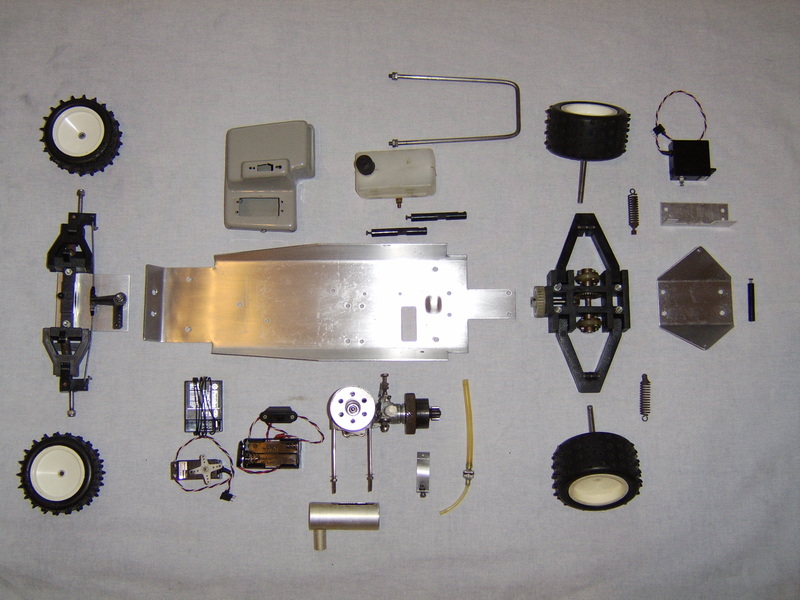
All the parts clean and ready for re-assembly, I am going to re-assemble it to the original spec. then the modifications can be done afterwards with any parts that need removing being taken off as required, I am also going to leave the greasing of the drive train untill the car is ready to run. You may also notice the better quality photo, I have started using my mums camera for the rebuild and modifications so I can get better close up photos.
All the parts clean and ready for re-assembly, I am going to re-assemble it to the original spec. then the modifications can be done afterwards with any parts that need removing being taken off as required, I am also going to leave the greasing of the drive train untill the car is ready to run. You may also notice the better quality photo, I have started using my mums camera for the rebuild and modifications so I can get better close up photos.
Pic 9
Marauder 009 - 6/8/10
It seemed logical to start at the front and work back, the re-assembly is pretty straight forward as its just nuts and bolts. I've added washers inside the radio box to spread the load of the fixing bolts.
It seemed logical to start at the front and work back, the re-assembly is pretty straight forward as its just nuts and bolts. I've added washers inside the radio box to spread the load of the fixing bolts.
Pic 10
Marauder 010 - 6/8/10
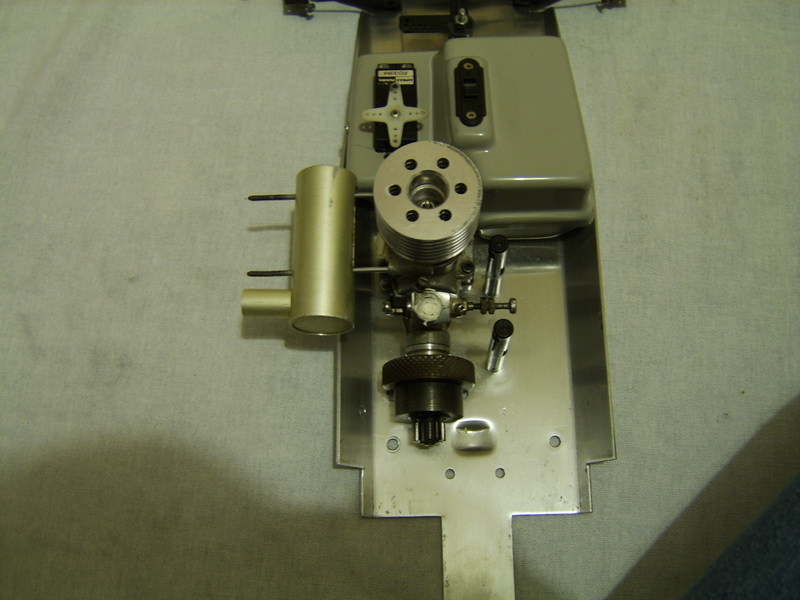
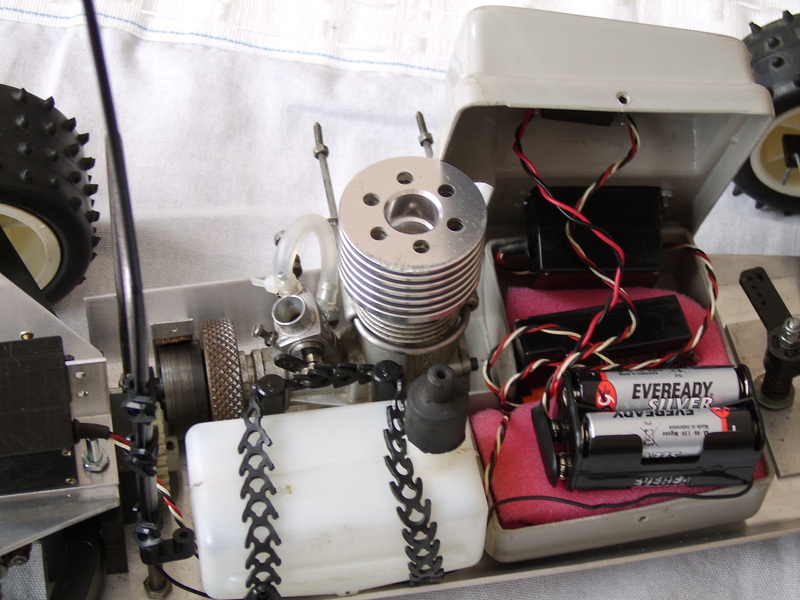
The first problem encountered - I had intended to mount the exhaust further in toward the engine so it didn't stick out of the side of the body, either by mounting directly to the engine or by shortening the extension piece. Mounting it directly to the engine is out as it will get in the way of the carb (mounted as in the photo) and if its turned round it will hit the radio box. Also I have re-fitted the carb the opposite way around to how it came off (to aid with relocating the exhaust) but the needle valve adjuster is too long to fit in with the fuel tank in place so will have to be put back as it was. This must be taken into account when shortening the exhaust extension, the alternative is to make a new smaller exhaust but for the time being it will be built up as it came apart.
The first problem encountered - I had intended to mount the exhaust further in toward the engine so it didn't stick out of the side of the body, either by mounting directly to the engine or by shortening the extension piece. Mounting it directly to the engine is out as it will get in the way of the carb (mounted as in the photo) and if its turned round it will hit the radio box. Also I have re-fitted the carb the opposite way around to how it came off (to aid with relocating the exhaust) but the needle valve adjuster is too long to fit in with the fuel tank in place so will have to be put back as it was. This must be taken into account when shortening the exhaust extension, the alternative is to make a new smaller exhaust but for the time being it will be built up as it came apart.
Pic 11
Marauder 011 - 7/8/10
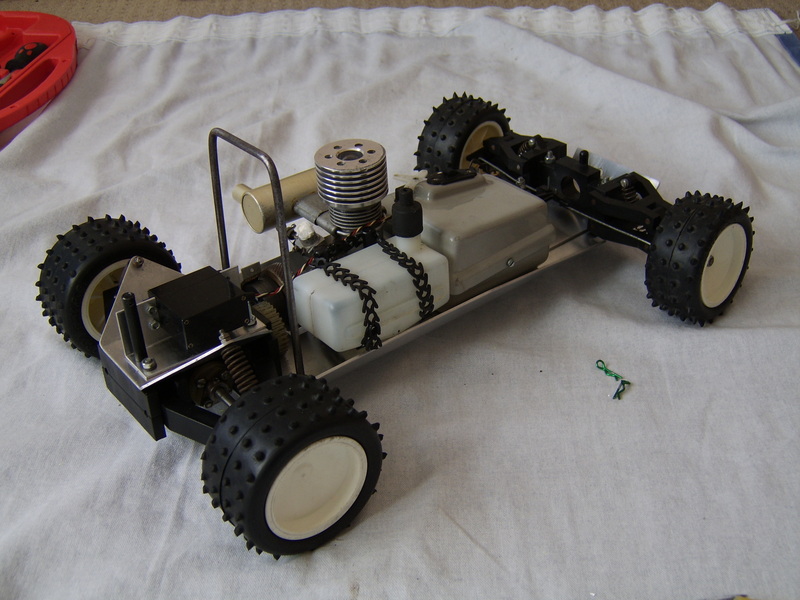
Just the back end to build up; the servo and rear body post have been pre assembled onto the plate before fixing to the car. Also to hold the fuel tank in place I have used a couple of Rapstraps (these where on Dragons Den a few years ago) they are an alternative to cable ties and are able stretch a little, I have removed a couple of the outer 'teeth' where it goes round the mounting posts at the top to help it sit in the grooves properly. The hope is that this will not deteriorate like elastic bands do.
Just the back end to build up; the servo and rear body post have been pre assembled onto the plate before fixing to the car. Also to hold the fuel tank in place I have used a couple of Rapstraps (these where on Dragons Den a few years ago) they are an alternative to cable ties and are able stretch a little, I have removed a couple of the outer 'teeth' where it goes round the mounting posts at the top to help it sit in the grooves properly. The hope is that this will not deteriorate like elastic bands do.
Pic 12
Marauder 012 / 013 / 014 / 015 - 7/8/10
The basic rebuild is now complete, all of the main parts are bolted back in place but nothing is wired up or connected, I am going to have to move / modify / re-think some bits as well as getting some new parts that have been ordered on eBay. I also need to replace grub screws, servo linkages and other bits and pieces.
In photo 015 you will see that one of the screws holding the rear suspension assembly on is a replacement (the original was missing) this screw is M4 x 50mm long (came in a pack of 5 from Wilkos), 10mm longer than the original and should provide a mounting point for the break linkage pivot.
Pic 13
Pic 14
Pic 15
Pic 16
Marauder 016 - 7/8/10
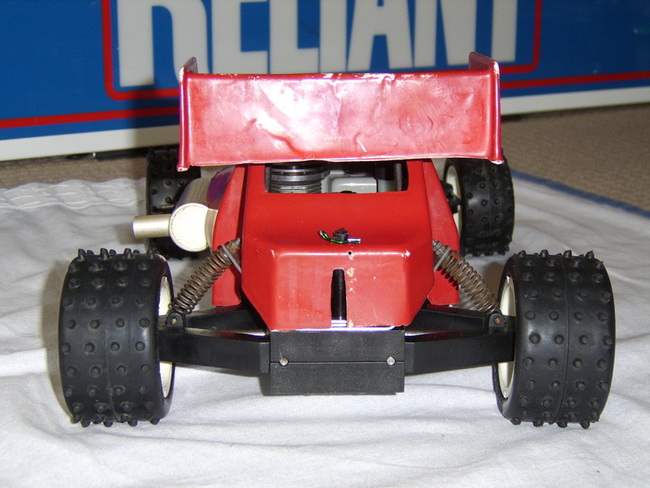
The rear suspension was quite limp when I got the car and the springs where not doing much, before refitting I stretched the springs so that they where about 5-6mm longer so that they actually took up the weight of the car.
The rear body mount has been fitted properly through the shell with an R-clip, previously the whole servo mount plate had been fitted further back to allow space for the break linkages and had stuck out of the back, hence the slot in the rear of the shell. You can also see that the wing is going to need trimming to neaten it up.
pic 17
Marauder 017 - 8/8/10
New fuel line and a pack of whip aerials where delivered yesterday so I have connected the fuel tank up and fitted the whip areal, this was chosen as I didn't want to drill holes in the top of the radio box as it is in such good condition. The areal has also been rapstraped to the roll bar so that there are no additional holes needed in the chassis or body shell - just a slight extension of the slot for the roll bar.
As I was fitting the areal I decided to connect up the servos and fit out the radio box, the pink sponge to stop everything moving around is another scouring pad, a small slot was cut into the back of the radio box lid for the wires to pass through (after the photo was taken) and the screws holding the lid on where replaced with larger ones as the originals had stripped out.
I have decided that the car needs a smaller exhaust (shorter so it can go straight on the engine without hitting the carb as it would now) this has been measured up and some basic sketches done for the main exhaust body so I can start making something to try for size.
pic 18
Marauder 018 - 10/8/10
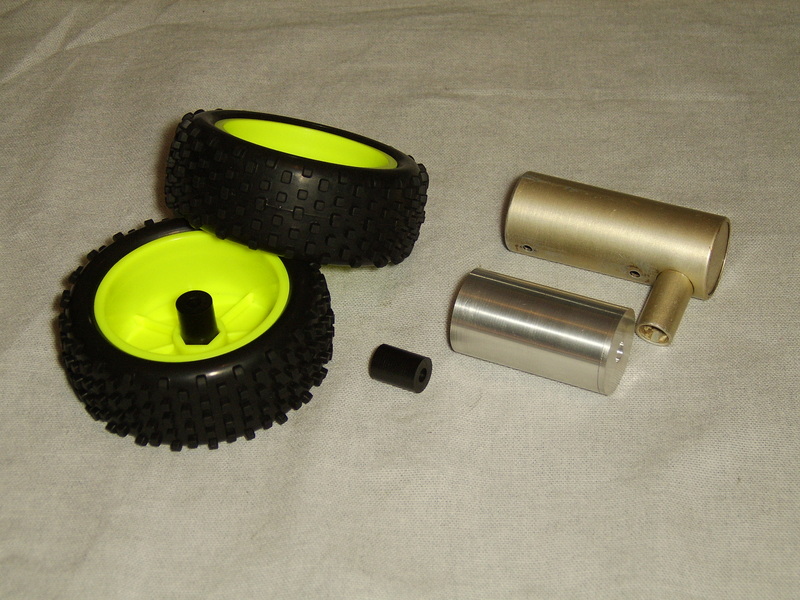
I managed to get the smaller exhaust body made today. It is 52mm long, 20mm shorter than the original. I have also made two wheel spacers for the new front wheels to position them correctly on the axels as the offset of the wheels is different to the originals, these are 16mm long and 12mm diameter to fit into the 12mm hex fitting on the wheels and the bore size is 4.76mm, a snug fit on the 10/32 UNF stub axels.
I managed to get the smaller exhaust body made today. It is 52mm long, 20mm shorter than the original. I have also made two wheel spacers for the new front wheels to position them correctly on the axels as the offset of the wheels is different to the originals, these are 16mm long and 12mm diameter to fit into the 12mm hex fitting on the wheels and the bore size is 4.76mm, a snug fit on the 10/32 UNF stub axels.
pic 19
Marauder 019 - 14/8/10
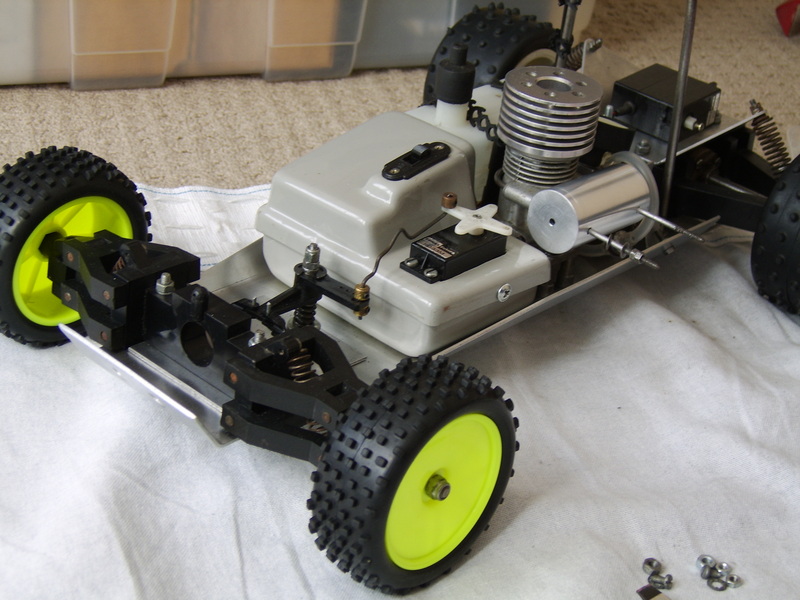
The new front wheels now fitted with spacers and the exhaust body trial fitted, the back edge has been flatted and slotted to bolt on to the engine and it goes on no problems. As you can see I added a 3mm hole in each end of the exhaust to attach the end cap using a bolt through but realised that the U-bolt holding the exhaust on will get in the way, luckily the end cap had to be pressed in so the through bolt is not required, I will tap these two holes M4 and put a screw in each to seal them up.
Also the rear servo mounting plate has been removed to measure up for a modified one to allow space for the break linkages by moving the servo back 13mm. I have done a CAD drawing of this so it can made by in-putting the drawing straight into a CNC operated punch.
pic 20
Marauder 020 - 15/8/10
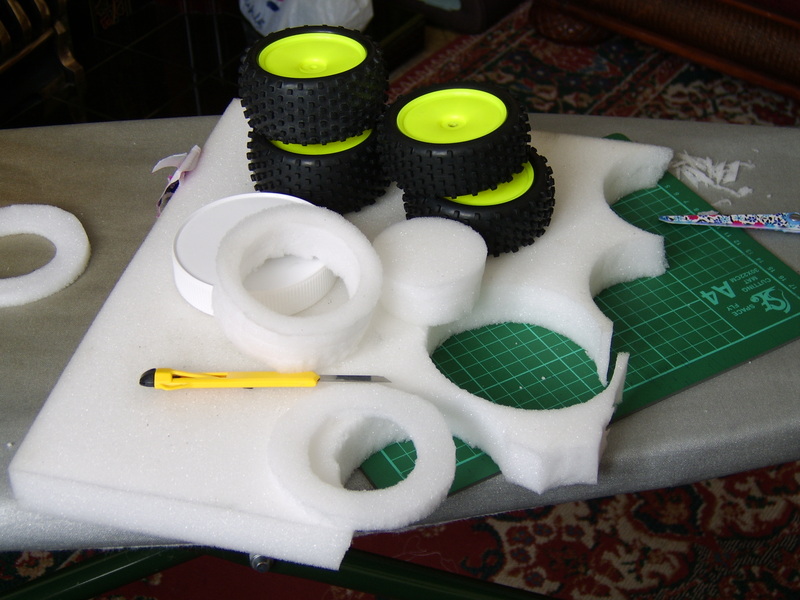
The new wheels had no foam tyre inserts and the tyres are very soft so I decided to have a go at making some myself. They are made out of 30mm thick foam that I had from packaging and where cut with a snap blade knife using food cans, lids etc. to cut around, for the front wheels the foam was trimmed to about 22mm wide. The internal diameter was cut smaller than the wheel and the outer diameter bigger than the tyre so that they are squashed into the tyre and give plenty of support to stop the tyre squashing. After being cut with a knife and trimmed with scissors they don't look as neat as the bought ones (and don't need to!) but they do a good job and I'm very pleased with them.
The new wheels had no foam tyre inserts and the tyres are very soft so I decided to have a go at making some myself. They are made out of 30mm thick foam that I had from packaging and where cut with a snap blade knife using food cans, lids etc. to cut around, for the front wheels the foam was trimmed to about 22mm wide. The internal diameter was cut smaller than the wheel and the outer diameter bigger than the tyre so that they are squashed into the tyre and give plenty of support to stop the tyre squashing. After being cut with a knife and trimmed with scissors they don't look as neat as the bought ones (and don't need to!) but they do a good job and I'm very pleased with them.

pic 21
Marauder 021 - 20/8/10
The new throttle servo mount has now been made and fitted with the break pivot fitted on the extended screw through the bevel box and the linkage bars trial fitted, these will need setting and adjusting properly when the car is up and running.
While the servo mount was off I removed the bevel box cover to clean it up properly and grease the bevel gears I decided that the rear suspension will remain un-modified as it feels fine now the springs have been stretched slightly and the rubber CV Joints are in good condition so don't need replacing.
I have also fitted an air filter and trimmed the U-bolt for the exhaust so it can be fitted direct to the engine, to do this it had to be threaded much further along then trimmed to length, the thread is 6BA so a die was borrowed from work for this. Threading the U-bolt was hard work as a die holder can't be used due to the other side of the bolt, it was done gripping the die in pliers (it was a solid die not adjustable) and turning the bolt by hand - time consuming and hard on the hands but it worked.
pic 22
pic 23
pic 24
Marauder 022 / 023 / 024 - 28/8/10
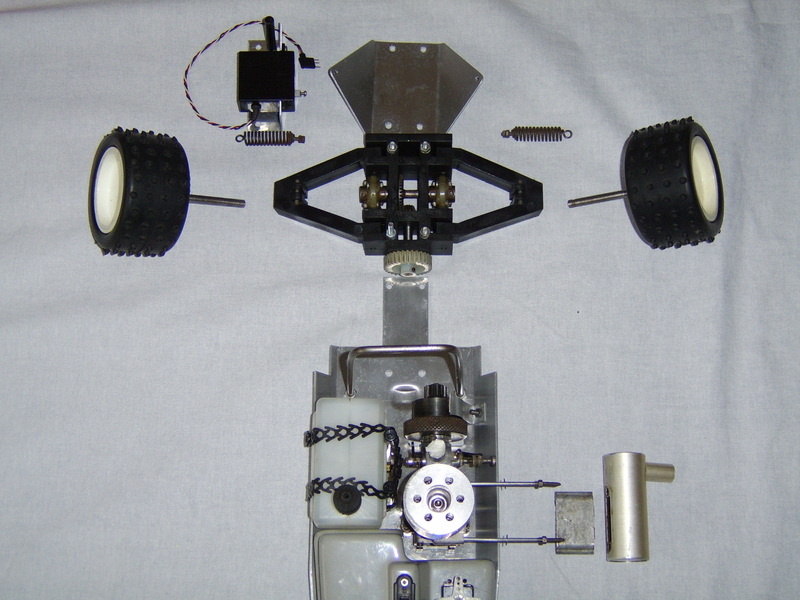
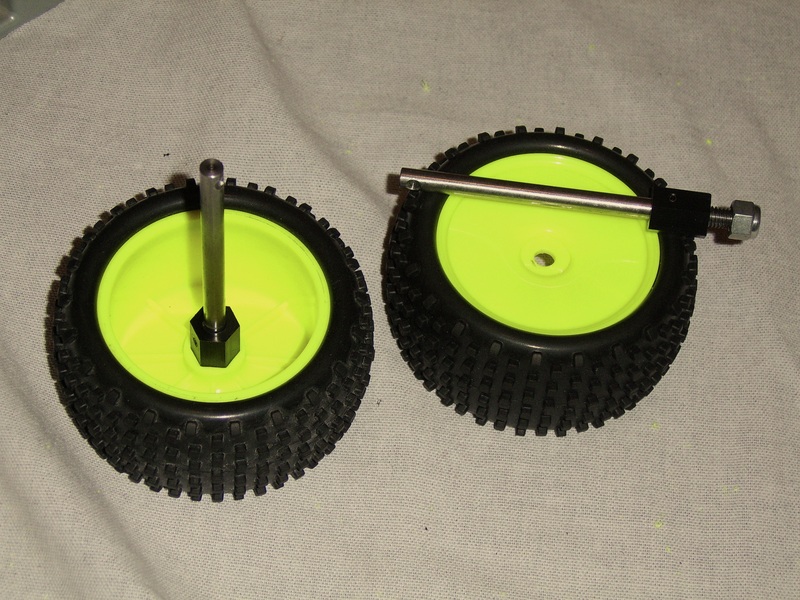
The new wheels have now been fitted after making the new rear axels similar to those on this site. For mine I simply threaded the end of the 6mm bar M6 and made 12mm hex spacers 16mm long (to offset the wheels by the correct amount) and drilled through 6mm diameter, these where a snug fit on the axel. The spacers where positioned correctly on the axels (70mm from the inner end) and pinned in place, I also added a 4mm diameter 'dimple' 4mm from the inner end of each axel for the grub screws to locate into as per the originals.
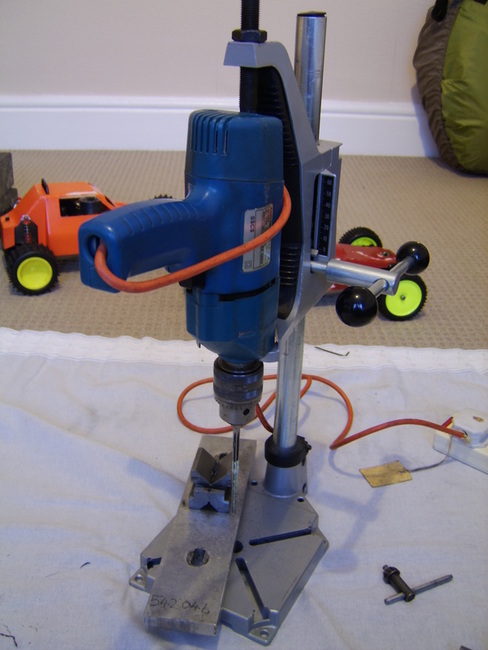
As the axel threads are 6mm diameter the holes in the wheels needed opening up from 4mm to 6mm, to do this accurately and maintain concentricity I used a tapered ream in a drill press with the wheel flat on the drill bed. Previously when opening up the holes in the front wheels (from 4mm to 4.8mm), I drilled them and this resulted in the holes being slightly off centre due to the drill cutting in where it first touches. So this time I used the tapered ream as it effectively self centres as it starts going into the hole.
The new wheels have now been fitted after making the new rear axels similar to those on this site. For mine I simply threaded the end of the 6mm bar M6 and made 12mm hex spacers 16mm long (to offset the wheels by the correct amount) and drilled through 6mm diameter, these where a snug fit on the axel. The spacers where positioned correctly on the axels (70mm from the inner end) and pinned in place, I also added a 4mm diameter 'dimple' 4mm from the inner end of each axel for the grub screws to locate into as per the originals.
As the axel threads are 6mm diameter the holes in the wheels needed opening up from 4mm to 6mm, to do this accurately and maintain concentricity I used a tapered ream in a drill press with the wheel flat on the drill bed. Previously when opening up the holes in the front wheels (from 4mm to 4.8mm), I drilled them and this resulted in the holes being slightly off centre due to the drill cutting in where it first touches. So this time I used the tapered ream as it effectively self centres as it starts going into the hole.

Marauder 025 - 5/9/10
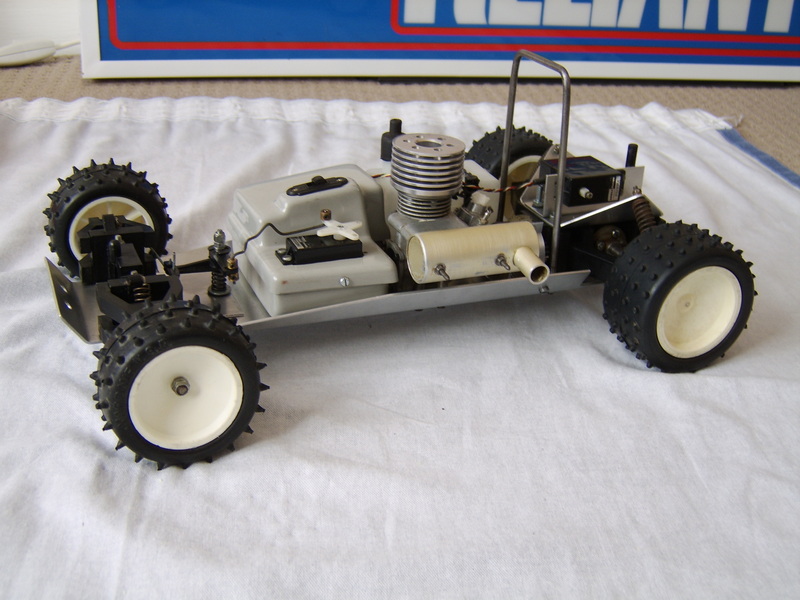
I have spent a good few hours on the body shell, first removing most of the old paint using paint thinners and a lot of rags to scrub it off (aprox 2 hours) then trimming the whole shell and wing to tidy them up as they where quite roughly cut (aprox 3 hours). The thinners have unfortunatly damaged the surface of the shell as I thought they might, however with a light rub down and a couple of coats of paint it should look fine. All the trimming is complete and a few small cracks in the body have been glued with superglue. Now I just need to hoover up all the trimmings!
I have spent a good few hours on the body shell, first removing most of the old paint using paint thinners and a lot of rags to scrub it off (aprox 2 hours) then trimming the whole shell and wing to tidy them up as they where quite roughly cut (aprox 3 hours). The thinners have unfortunatly damaged the surface of the shell as I thought they might, however with a light rub down and a couple of coats of paint it should look fine. All the trimming is complete and a few small cracks in the body have been glued with superglue. Now I just need to hoover up all the trimmings!
